In the realm of FrillPay transactions, settling invoices is a seamless process that unfolds with just a few clicks. Let’s demystify the steps involved in paying your invoices through FrillPay MyInvoice, ensuring a smooth and efficient experience.
Why FrillPay MyInvoice?
FrillPay distinguishes itself by offering a user-friendly platform that not only streamlines transactions but also prioritizes transparency. Whether you’re a seasoned user or a newcomer to FrillPay, the invoice payment process is designed to be accessible to all, ensuring that you have full control and understanding of your financial transactions.
Steps to Pay FrillPay MyInvoice:
This is so easy to pay any FrillPay invoices within a few clicks only, please follow the guide below to do so in a secure-way:
1. Accessing the Invoice
To initiate the payment journey, you need the MyInvoice link associated with the invoice you intend to pay. Simply copy and paste this link into your preferred browser to access the dedicated MyInvoice Payment tab provided by FrillPay.
2. Understanding the Invoice Details
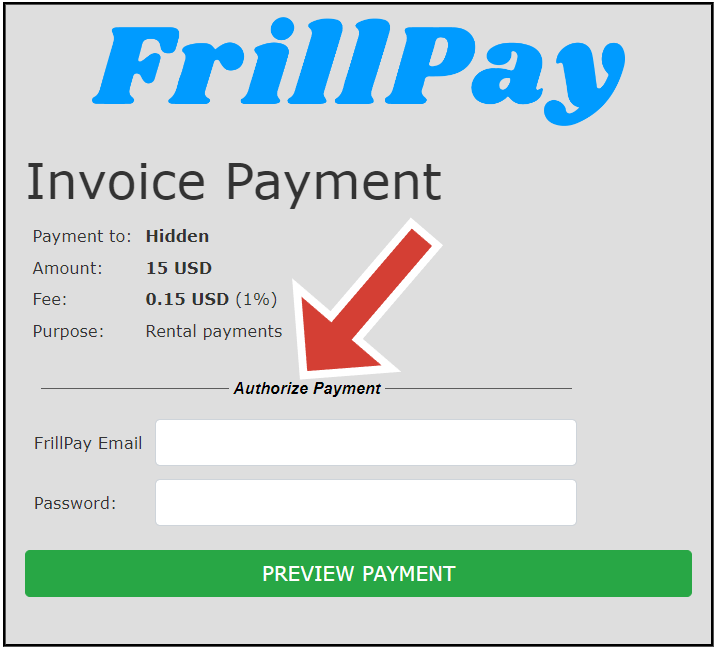
Upon reaching the MyInvoice Payment tab, FrillPay meticulously presents all the essential details related to your invoice. youll find:
- Payment to: [RECEIVER-NAME]
- User Wallet: [RECEIVER-WALLET]
- Amount: XX (USD)
- Fee: XX (%)
- Purpose: [INVOICE-PURPOSE]
This transparent display ensures that you have a comprehensive overview of the transaction details before proceeding.
2.1 What if you don’t see the Receipent Details?
We are thrilled to introduce a new feature on FrillPay MyInvoice designed to prioritize your privacy. Both senders and receivers now have the option to hide their details during transactions. To take advantage of this privacy feature, simply select ‘Don’t show my name & wallet’, and rest assured, your information will be treated with the utmost confidentiality.
3. Authorize your FrillPay Wallet
Directly below these details, you’ll encounter a user-friendly login form. Input your FrillPay wallet credentials to gain access. FrillPay prioritizes security, ensuring that your login process is both straightforward and safeguarded.

4. Confirming Your Payment
Successfully logging into your FrillPay wallet prompts a confirmation prompt for the payment. Review the payment details displayed. If everything aligns with your expectations, proceed by clicking the “Confirm Details & Send Payment” button.
5. Invoice Paid Successfully!
With a simple click, the amount specified in the invoice is swiftly credited to the designated recipient—be it a friend or family member. FrillPay’s commitment to a user-centric experience is evident in the efficiency and clarity embedded in the payment process.
In conclusion, navigating FrillPay’s invoice payment system is a testament to the platform’s commitment to simplicity and security. By adhering to these straightforward steps, you can confidently manage your payments, contributing to a seamless and enjoyable experience within the FrillPay ecosystem.
