In this detailed guide, we’ll take you through the steps on how to Verify FrillPay account? to ensure a seamless and secure user experience and to get the maximum limits/accesses.
Why Know Your Customer (KYC) is Required?
Know Your Customer (KYC) is essential for various reasons, including:
- Compliance: KYC helps businesses comply with legal and regulatory requirements mandated by government authorities to prevent money laundering, terrorist financing, and other illicit activities.
- Risk Management: By verifying the identity of customers, FrillPay can assess the risk associated with engaging in financial transactions and make informed decisions to mitigate potential risks.
- Fraud Prevention: KYC helps businesses identify and verify customers to prevent identity theft, account takeover, and other fraudulent activities, safeguarding both the business and its customers.
- Reputation Protection: Implementing robust KYC measures enhances the reputation of a business by demonstrating a commitment to transparency, integrity, and ethical business practices, which can attract and retain customers.
- Financial Integrity: KYC promotes the integrity of financial systems by ensuring that only legitimate and law-abiding individuals and entities participate in financial transactions, thereby preserving the stability and trustworthiness of the financial sector.
Overall, KYC plays a crucial role in fostering trust, maintaining security, and upholding regulatory compliance in the financial industry.
How to Verify FrillPay Account? – KYC Guide!
Step 1: Visit FrillPay.com
To kickstart the account verification process, head over to the official FrillPay website at FrillPay.com. If you’re new to FrillPay, sign up for an account by providing the necessary information and following the prompts.
Step 2: Log In to Your Account
Upon reaching the FrillPay website, log in to your account using your registered email address and password. Forgot your password? No worries! Simply follow the instructions provided on the login page to reset it.
Step 3: Access the FrillPay Dashboard
After a successful login, you’ll be directed to the FrillPay dashboard. Here, you can explore various features and settings related to your account. Spend a little time getting to know how the dashboard looks and checking out the different ways you can move around it before you go to verify FrillPay account.
Step 4: Go to the Account Validation
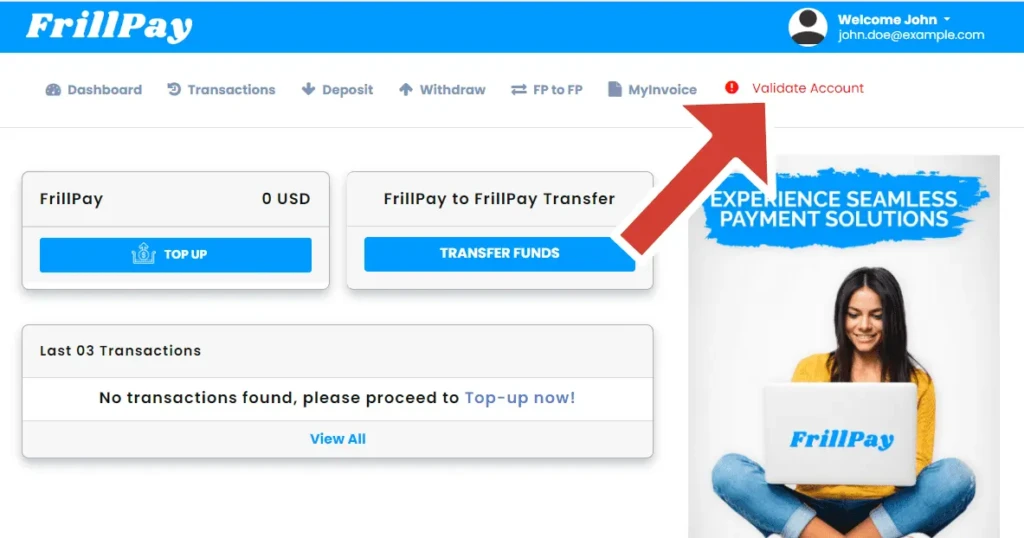
To kick off the account verification process, keep an eye out for a “Validate Account” message on the top navigation bar of the dashboard, highlighted in red. Alternatively, access the “Settings” option from the navigation and then click on ‘Account Validation’ tab.
Step 5: Choose Your Verification Method
In the Account Validation section of the Settings menu, you’ll find two options for verifying your account:
- Uploading your National Identity Card (ID Card)
- Uploading your Passport
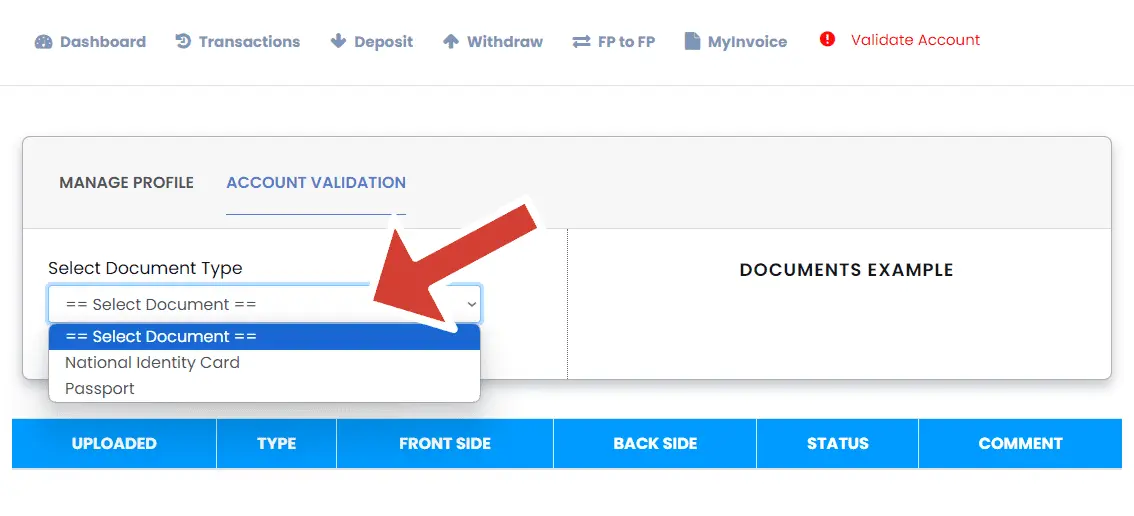
Choose the appropriate option based on the document you have available.
Step 6: Upload Your Document
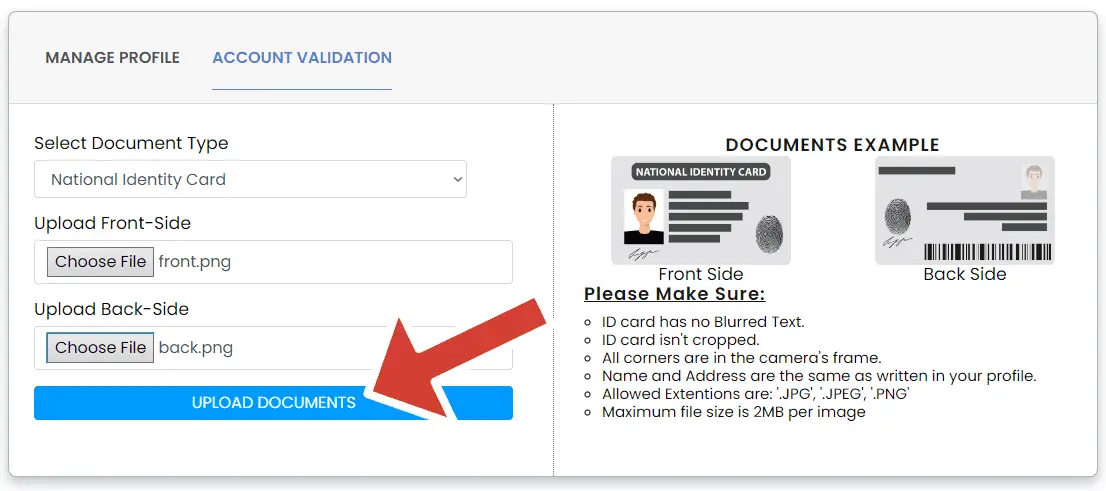
Once you’ve selected the type of document to upload, you’ll be presented with examples and detailed instructions for verification. Follow below instructions carefully to ensure successful verification by the FrillPay’s validation team.
- All text in the document is clear and legible, with no blurred sections.
- The document is current and has not expired.
- All corners of the document are fully visible within the camera frame.
- The name and address provided match those in your profile.
- Acceptable file extensions for upload include ‘.JPG’, ‘.JPEG’, ‘.PNG’, and ‘.PDF’.
- Each image or file must not exceed a maximum size of 2MB.
Step 7: Confirm Submission
After uploading your document and reviewing the instructions, click on the “Upload Documents” button to confirm your submission. This notifies the FrillPay’s validation team that your documents are ready for review.
Step 8: Await Verification
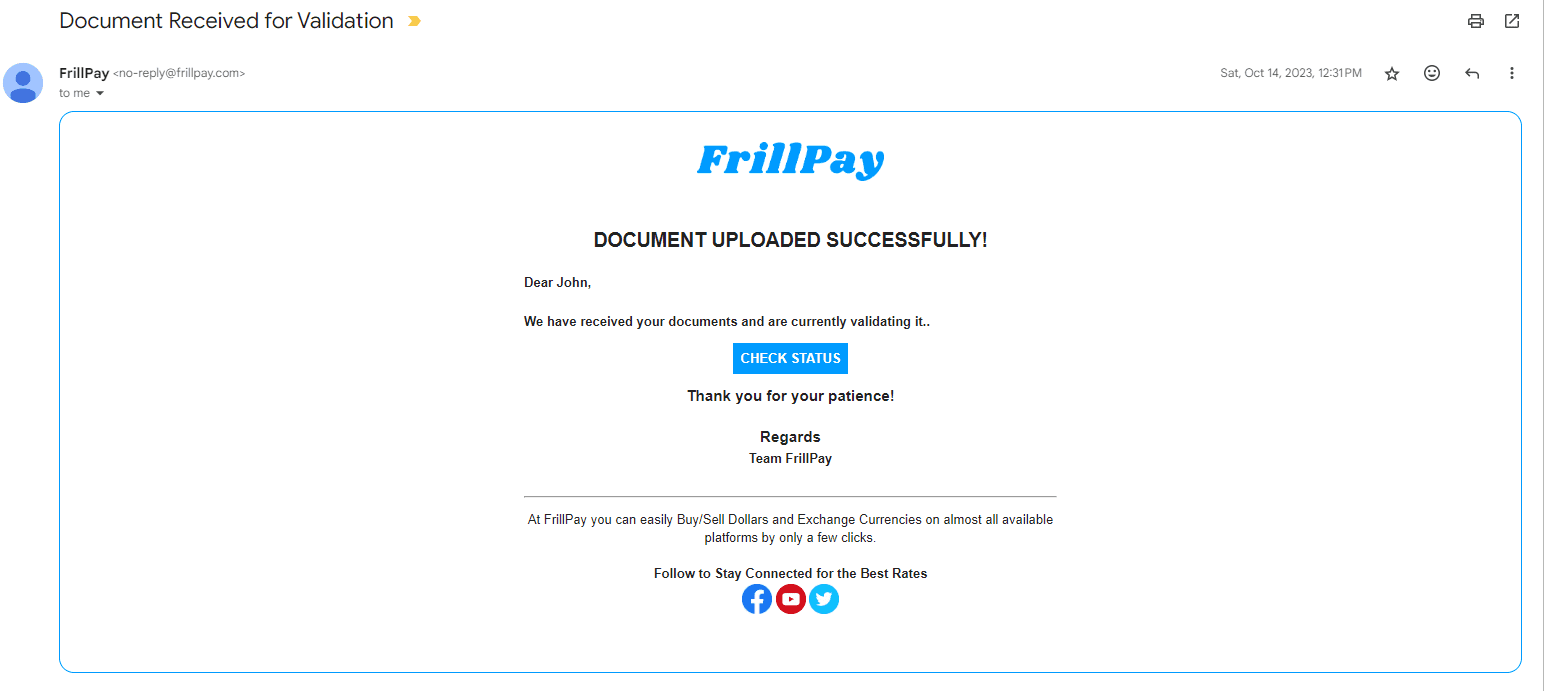
Congratulations! Your documents have been successfully submitted for verification. Expect to receive a response via email within a reasonable timeframe. You should have received an email that confirms your submission too.
STEP 9: Check Validation Result/Status
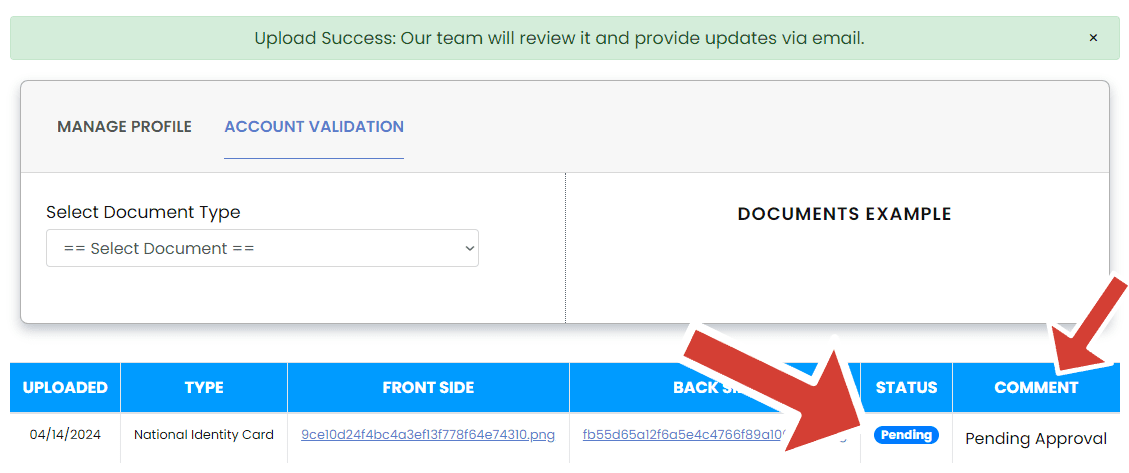
After the submission the FrillPay’s validation team will either verify FrillPay account or reject the application, in both cases you’ll be updated via email or you can monitor the portal for updates on your document status with reason/comment in the “Account Validation” section as shown in picture below:
Once you submit your application, FrillPay’s validation team will carefully examine your FrillPay account details and documents you’ve provided. They will then either approve your account or inform you of any issues that prevent approval. You will be notified by email.
Additionally, you can track the progress of your application and view any comments or reasons for rejection within the “Account Validation” section of the portal as shown in a screenshot below:
By following above straightforward steps, we hope that you will be able to verify Frillpay account that provides you with added security and peace of mind while utilizing the platform’s financial services.
Thank you for choosing FrillPay for your financial needs.
