In the fast-paced world of digital finance, FrillPay emerges as a beacon of efficiency, providing users with an intuitive platform to manage their financial transactions seamlessly. Among its array of features, the ability to create and manage invoices stands out as a testament to FrillPay’s commitment to user-friendly financial interactions. In this comprehensive guide, we’ll delve into the step-by-step process of crafting invoices with FrillPay MyInvoice, ensuring a smooth and secure experience.
Why you need the FrillPay’s Invoicing System?
- User-Friendly Interface: FrillPay’s dashboard and invoicing system boast a user-friendly interface, ensuring a straightforward and intuitive experience.
- Efficient Creation Process: The process of creating an invoice is streamlined, allowing you to initiate and complete the task efficiently.
- Transparent Transaction Details: FrillPay MyInvoice system provides a comprehensive overview of your transaction details, promoting transparency and clarity.
- Security Measures: Benefit from FrillPay’s seamless security system, ensuring that your invoicing process is not only efficient but also secure.
- Your Privacy: We provide the privacies for both ‘Sender’ & ‘Receiver’ to send/receive payments without disclosing themselves to each others.
Step-by-Step Guide to Create an Invoice with FrillPay MyInvoice:
- Navigate to the MyInvoice Tab: Begin your invoicing journey by logging into your FrillPay account. At the top of the dashboard, you’ll find the “MyInvoice” tab. Click on it to enter the invoicing section.
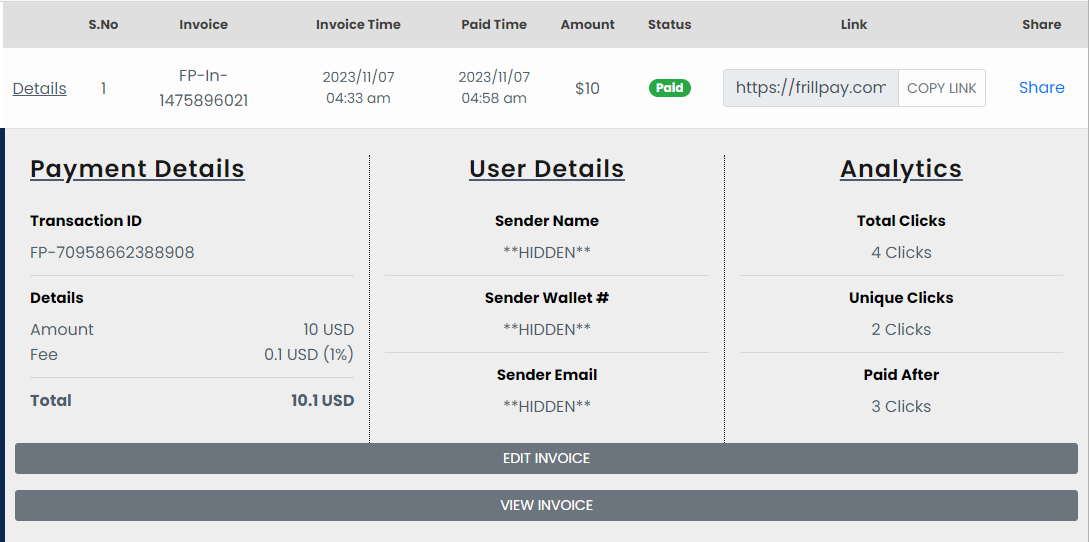
- Review Previous Invoices: Take a moment to review the table displaying all your previous invoices (If have any). FrillPay ensures transparency by providing easy access to your transactions history.
- Create a new Invoice: To create a new invoice, locate and click on the “CREATE NEW” button at the top of the table.

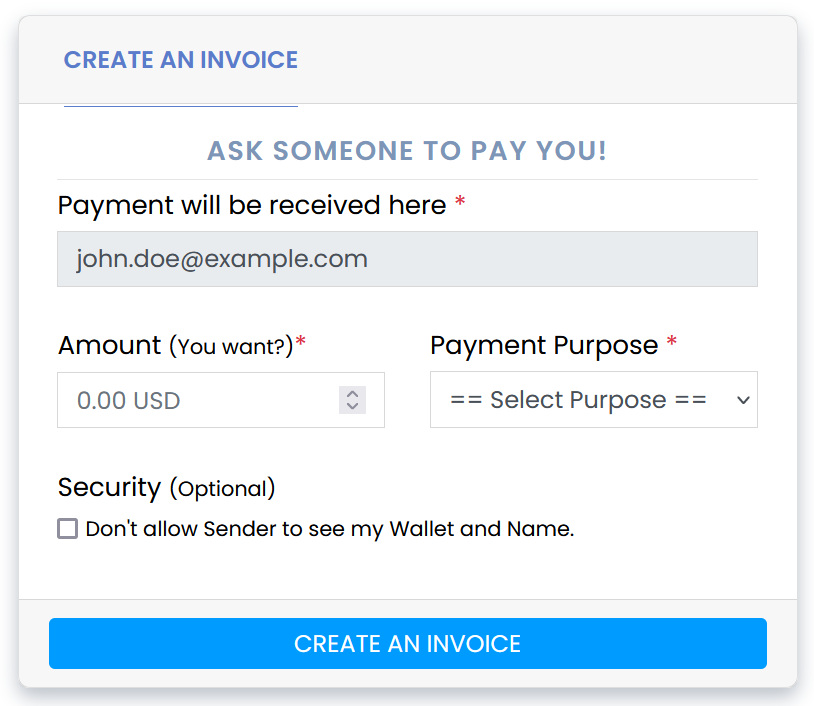
- Fill-up the Form: FrillPay will display a user-friendly “Create An Invoice” form. Carefully fill in all required details, including the amount, payment purpose, and any additional options provided.
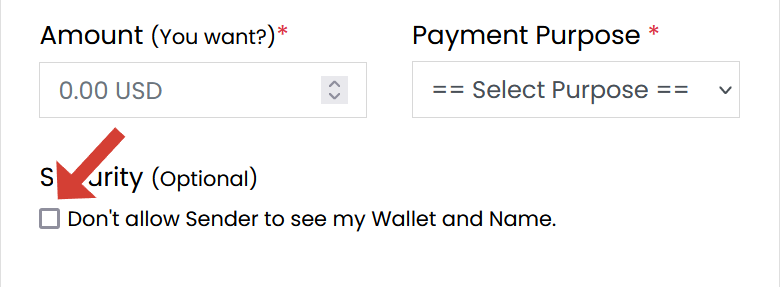
- Privacy Settings: If you enable the ‘Security’ option, it enhances the privacy of your wallet. This means the sender won’t be able to see who they are sending funds to, click to learn more.

- Submit the Form: After filling in the necessary information, submit the form. FrillPay streamlines this process to ensure a swift and secure submission.
- Automatic Redirection to the Invoice Page: Within 05 seconds of form submission, you’ll be automatically redirected to the “Invoices” page. There, you can view and manage the newly created invoice.
- Share the Invoice & Get Paid: It’s time to share a newly created invoice with others to receive a payment in your FrillPay wallet.

In Conclusion
With FrillPay, the creation and management of invoices become an integral part of your effortless financial journey. Embrace the user-friendly features, transparency, and security embedded in FrillPay MyInvoice system, setting the stage for a new era of seamless financial transactions. As you navigate the intricacies of digital finance, let FrillPay be your trusted companion in optimizing your financial interactions.
